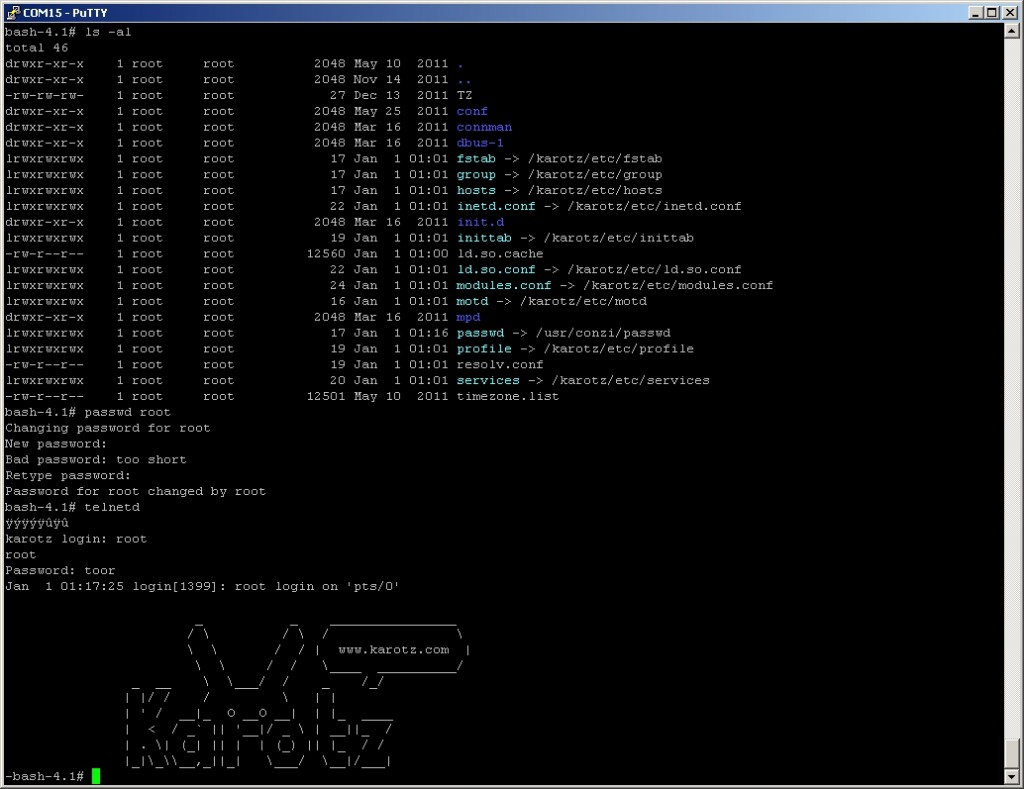
Karotz Root Hack
Für die meisten wahrscheinlich extrem langweilig, aber für mich nicht! Heute Nacht wurde ich, was das „Hacken“ angeht, zum Mann: ich dürfte der erste sein, der seinen Karotz gerooted hat 😉

Ich weiß, dass man das root Passwort lesen kann 😉
Außerdem habe ich meinen Küchen-Abfluß besiegt… 😉
Guido 12:10 am 16. Dezember 2011 permalink |
Hi, fuer mich auch arg spannend und nicht langweilig. Hatte nach dem Nabaztag von eBay meinen Karotz auch zum kleinen Preis bestellen koennen. Gestern ist er angekommen. Kann man irgendwo lesen, wie man den Kleinen rooted? Arbeitet er gerooted auch noch mit karotz.com zusammen? Ich finde es schade, dass man nur einen Iphone/Android-Controller nutzen kann. Vom PC faend ich es auch gut. BTW: Der Android-Controller sieht auf dem Toshiba AC-100 nicht so prall aus…aber immerhin konnte man den mit dem Custom ROM laden aus dem Market 🙂
mc 13:42 am 16. Dezember 2011 permalink |
Hi Guido, aktuell kann man das (hier) noch nicht nachlesen – und wo anders glaube ich auch nicht 😉 Da das Ganze nicht ganz trivial ist, Lötarbeiten erfordert und auch einen Reboot nicht übersteht, werde ich noch ein wenig forschen und die einzelnen Schritte dann hier sorgfältig dokumentieren. Ich hatte bisher aus Zeitmangel noch nicht die Möglichkeit, den Hasen weiter zu untersuchen. Nur den
telnetdhab ich mal gestartet und mich von meinen Rechner aus angemeldet. Die LED von derbashaus zu steuern war auch leicht möglich – an die Ohren und den Rest muss ich noch ran 😉Nach dem Rooten kann man den Hasen ohne Einschränkung weiternutzen und er arbeitet auch noch mit karotz.com zusammen.
Zur Steuerung vom PC aus bietet sich die REST API an. Schau Dir mal den Developer-Bereich bei karotz.com an, da ist alles dokumentiert. Und was den Controller auf dem AC100 angeht: ja, da hast Du recht 😉
Bis demnäx, Martin
mc 16:19 am 28. Dezember 2011 permalink |
So, die Anleitung nimmt unter http://www.openrabbit.de langsam Gestalt an…
esc 22:22 am 6. Januar 2012 permalink |
Hab gerade einen bestellt. Freu mich drauf die Anleitung auszuprobieren. Habe selber 10 Jahre Linux Erfahrung und Freunde die mir beim löten helfen werden. Wird lustig!
Archer 1:41 am 13. Januar 2012 permalink |
Hi martin,
i follow your instructions on openrab it.de but i can not flash karotz
$ /sbin/flash_eraseall /dev/mtd2
$ /sbin/nandwrite -pm /dev/mtd2 openrabbit.rootfs.img.gz
I try to use the key-factory.zip provide by karotz and change the autorun but without succes (the gpg on autorun.sig and autorun is the probleme i think)
Have you some advice ?
Thanks
Archer
mc 8:49 am 13. Januar 2012 permalink |
Archer, you are right. It seems that it is not possible to flash a new RootFS using the „autorun“-method and an USB-Stick. The files are signed and it is not possible to skip the verification of the signatures.
The only way i figured out to get a new firmware running on my karotz was to solder a serial port, get a serial (root) console and execute the flash commands from „inside“.
Did you already solder the serial port like discribed here and have you seen the serial output running on your screen while booting? If done so, „you have proven to be worthy“ 😉 and you will be the first who get’s knowledge of the „secret“ needed to get a root console…
Archer 9:28 am 13. Januar 2012 permalink |
Hi martin,
thanks for your quick reply 🙂
ans yes i have seen the serial output 🙂 with that :
http://imageshack.us/photo/my-images/20/ftdiuartkarotz.jpg/
Archer
mc 9:40 am 13. Januar 2012 permalink |
Great work! Your soldering is much better than mine 😉 Am i allowed to use your photo on my website?
The next steps in short are: add
init=/bin/shto the kernel commandline and become root 😉 Then execute the whole content of/linuxrcWITHOUT the last line (/sbin/init) and you are done! I’m writing this down on openrabbit.de in this moment…Archer 9:48 am 13. Januar 2012 permalink |
Hi Martin,
thank you very much, i try this now and take a better photo for your website :p
mc 11:09 am 13. Januar 2012 permalink |
So, die Doku auf http://www.openrabbit.de ist nun komplett!
Archer 12:32 am 13. Januar 2012 permalink |
Thx for all martin, it works very well
http://imageshack.us/photo/my-images/208/thxmartin.jpg/
And the photo : http://imageshack.us/photo/my-images/43/ftdiuartkarotz2.jpg/
If you want another picture, do not hesitate to ask
Archer
mc 13:15 am 13. Januar 2012 permalink |
Great Work, Archer! Your Rabbit is Number 2 😉 If you like to be present in the Hall of fame, then please send me an picture and the name of your rabbit, which I could use there…
Eric Betts 4:55 am 26. Januar 2012 permalink |
Can you post the rabbit’s shadow file?
mc 12:16 am 26. Januar 2012 permalink |
Eric,
if you mean the password shadow file (/etc/shadow) so i couldn’t, because the Karotz doesn’t use one. The password hash is stored in the /etc/passwd file like described here: http://openrabbit.conzi.com/doku.php?id=openrabbit:or_vorbereiten#root_passwort_aendern
Martin
Eric Betts 1:22 am 28. Januar 2012 permalink |
Good to know; could you post the contents of the /etc/passwd file? On that page you show how to create a new user, but not what users are already there.
mc 10:07 am 30. Januar 2012 permalink |
Hi Eric, the original Karotz‘ passwd file looks like this:
root:$1$LqiRluZX$cKw/OIoSCUUK6jIP8Y6g1.:0:0:root:/usr/karotz:/bin/bashbin:*:1:1:bin:/bin:
daemon:*:2:2:daemon:/sbin:
nobody:*:99:99:Nobody:/:
dbus:x:81:81:dbus:/var/run/dbus:/bin/sh
Guido 8:59 am 22. Mai 2012 permalink |
Ohh 🙂 Du hast ja ein paar schoene Informationen zusammen bekommen. Ich hab mir den Link vom OpenRabbit nach Hause gesandt und hoffe doch mal OpenRabbit No 3 zu werden 🙂